Friends,
There has been some confussion on how to install the new OS 4.1 with the new USB pen drives provided by Ketron so here is a detailed step-by-step procedure to follow as it's pretty easy ...
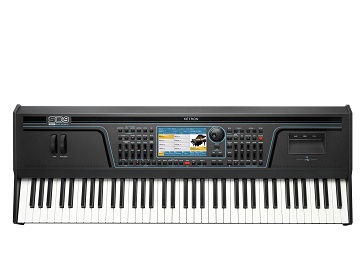
1. On the front left corner of your AUDYA exist 2 USB slots. The USB slot you should insert your new USB pen drive into is the first from left (far left slot which is the master USB slot). Insert the USB pen drive into the first USB slot.
2. Turn on your Ketron AUDYA and wait for it to boot up completely.
3. If you have any ...
* USER STYLES
* USER PROGRAMS
* REGISTRATIONS
Now would be the time to back them up onto an external USB storage device as these files in the Hard Drive's designated folders will be over-written. You may insert a different USB stick into the 2nd USB slot (unless you want to create a new TEMP folder within the HD and back these files up into that folder). However, if you want your AUDYA to be as though it came from the Factory, then skip this back-up step and proceed below to point #4.
4. Press the DISK button on your AUDYA. Audya will display (by default) contents of the Hard Drive C:Internal (associated with the U1/5 tab).
5. Press the U2/7 tab to access the contents of your USB pen drive (D:REMOV).
6. Press the DISK MENU (U5/10) to access the various disk functions.
7. Press the "V" data cursor button or turn the data wheel to hightlight the file "AUDYA41B.MEM and press ENTER to select it (a blue dot is displayed to the right of the file).
8. Press COPY (F1) to activate the COPY operation. AUDYA will now go back and display both the C and D drives, asking you to select where you want to copy the selected file to.
9. Use the "V" cursor button or data wheel to highlight C:Local and press ENTER to display it's contents. You will now be at the root directlry of AUDYA's Hard Drive.
10. Press EXECUTE (U5/10) to copy the new OS file selected from the USB pen Drive into the AUDYA's Hard Drive.
11. When done, press DISK to get out of the DISK menu.
12. Press the DISK button again to access the DISK MENU (rather than pressing EXIT several times to get to this screen).
13. Press the "V" data button or use the Data wheel to scroll down and highlight the old OS file (e.g AUDYA40a.mem, AUDYA41a.mem ... etc).
14. Press the DISK MENU (U5/10) to access the disk functions once more.
15. Press ENTER to select the old OS file that was just highlighted (your goal is to delete this file). A blue dot is displayed to the left of the selected file's name.
16. Press DELETE (F2) to activate the DELETE function.
17. Press EXECUTE (U5/10)to DELETE the selected file. There should only be one *.mem file in your Audya's root directory!
18. Turn OFF your AUDYA. The goal is to reload this new OS which has functions built in that will automatically copy the new files from your USB pen drive into the appropriate folders within the AUDYA's Hard Drive and hence less room for errors!
19. Load the new AUDYA OS by pressing and holding down F10 and Unplugged while turning on your AUDYA. Release when you see the white BIOS screen.
20. AUDYA will automatically load the new OS file. Preset buttons will be turned on sequencially as OS loads. DO NOTHING and DO NOT POWER OFF (keep kids away)! When the new OS loads completely, AUDYA will automatically reboot!
21. When AUDYA turns on, new OS 4.1 should be displayed during the boot sequence at the bottom right side of screen. If not, STOP (when completely powered on) and repeat proccess above as you missed a step!!
22. When AUDYA is powered on and ready to be played (default screen showing style and sound), press the DISK button once more to access the disk drives. By default, the contents of the internal drive (C) will be displayed.
23. Press the D:REMOV (U2/7) to access the contents of the USB pen drive.
24. Press "V" data button or use the Data wheel to select the first file "00KTNinstall00" and press ENTER to beging installing the new Sounds, Styles, settings, Wave Tables, Live Guitars, Programs, Presets, ... etc.
DO NOT INTERUPT THIS PROCESS FOR WHATEVER REASON. Take a break, go to the movies, do whatever you need to do for the next 3.5hrs, as your AUDYA will be busy being 'born again'!
25. When complete, AUDYA will return to normal operation. Turn your AUDYA off.
26. After 2 minutes, you may turn your AUDYA on again and proceed to use as before.
ENJOY YOUR NEW KETRON AUDYA!!
KETRON AUDYA 5 and AUDYA 4(and AUDYA's which display 4.1b or later when turned on) users:- do NOT install USB Pen drive files as you already have these pre-installed from KETRON!
Hope this helps.
Thanks,
AJ


 Previous Topic
 Index
Index